Getting back to my roots with CW

Today I took the Ten Tec Argonaut 5 out to my local park to get an activation in and to hopefully break 6,000 QSOs at this park… spoiler alert…I did it.
I wanted to do two things on this trip. The first was to use my Ten Tec Argonaut 5 radio and the second was to get enough QSOs in the log to break 6000 for this park. I did both.
The Ten Tec Argonaut 5 transceiver is a fun little radio if you love CW. It works well on the other modes it has as well, but I only use mine for CW. The Jones filter setup makes adjusting the filter bandwidth a snap and it works really well too. I can simply dial in the amount of filtering I want in an instant and not miss a beat, as they say. This radio really was built for CW though, as it has all the pertinent CW controls in an easy to access location on the front of the radio without really having to dive into menus to make changes while operating.
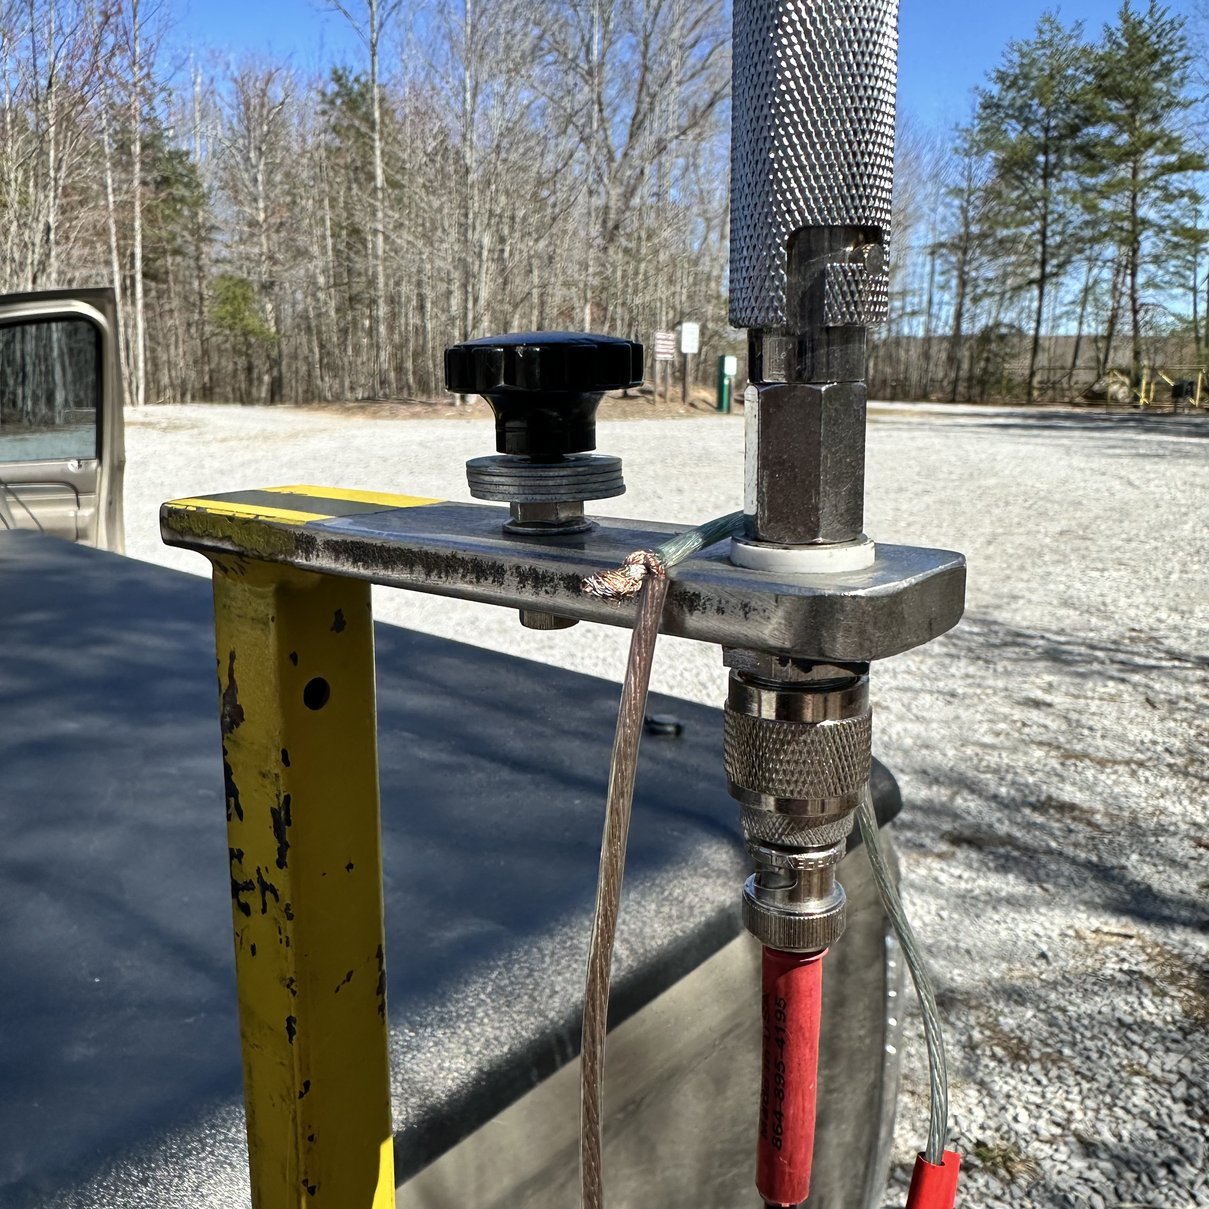
I get the Ten Tec Argonaut 5 out and set it up in the front seat next to me on the case I store it in. Next thing is to connect it to power, an antenna and a key. I have two options for connecting a keying cable to this radio. I figured out early on that I can connect a cable to the front of the radio into the microphone socket and close the PTT pin to ground with the CW key and it will key the transmitter like a straight key when it is in CW mode.
This is handy for a couple of reasons so if you have one of these radios and you use it for CW like me, this might help you. The first thing it does is make hooking up the cable so much easier. The port on the back is right next to the heat sink and is kinda hard to get a cable to fit as some plugs are too large in diameter to fit the space physically. The cable in the photo above that in in the lower right side of the photo will fit this location, but I do have some that wont fit the location and can not be used. I am using it in the photo to level the radio instead because I am plugged into the front socket. The next reason is that I can simply dead key the radio here for tuning purposes should I not have a resonant antenna and want to use a tuner. Lastly, it allows me to run an external keyer with this radio, to get keyer memories since the keyer in the radio doesnt have memories, this allows me to output a single contact (like a straight key) and key the radio easily.
The CW on the Argonaut 5 is simply blissful to use. If you know anything about using CW then you know how legendary the Ten Tec radios are for operating CW and the Argonaut 5 is no different. This radio is simply a joy to use. If you are into CW and have the opportunity to pick one up for reasonable money, I highly recommend you grab it. I happened into this one by chance and I am glad I picked it up. I still have not even checked if the SSB mod has been done to it. If it has not had the update done, then it will never have the mod as Ten Tec is no longer something I would consider to be “available” to perform this update with. You can find the schematic online for the mod but there is also a firmware update and if it crashes mid update, then your radio is bricked with no way to recover it. So tread lightly if you think you can tackle this project…Oh, did I mention that the firmware is written to be compatible with something like Windows 7? LOL, this just reinforces my point of “just live with it as is” if the mod has not been applied yet.
Once the radio was setup, then I got the antenna put together. I wanted to get on the higher bands today so I started on tinkering with the radial field to see what I could get away with on 20 meters that would work on 10 meters as well.
To start on 20 meters had me extending the radials out straight and taught from the base of the antenna and I tuned the whip by telescoping it down till the SWR null looked good on the nanoVNA. One set like this, I proceded to make 46 contacts on 20 meters! What a day, but wait! There’s more!
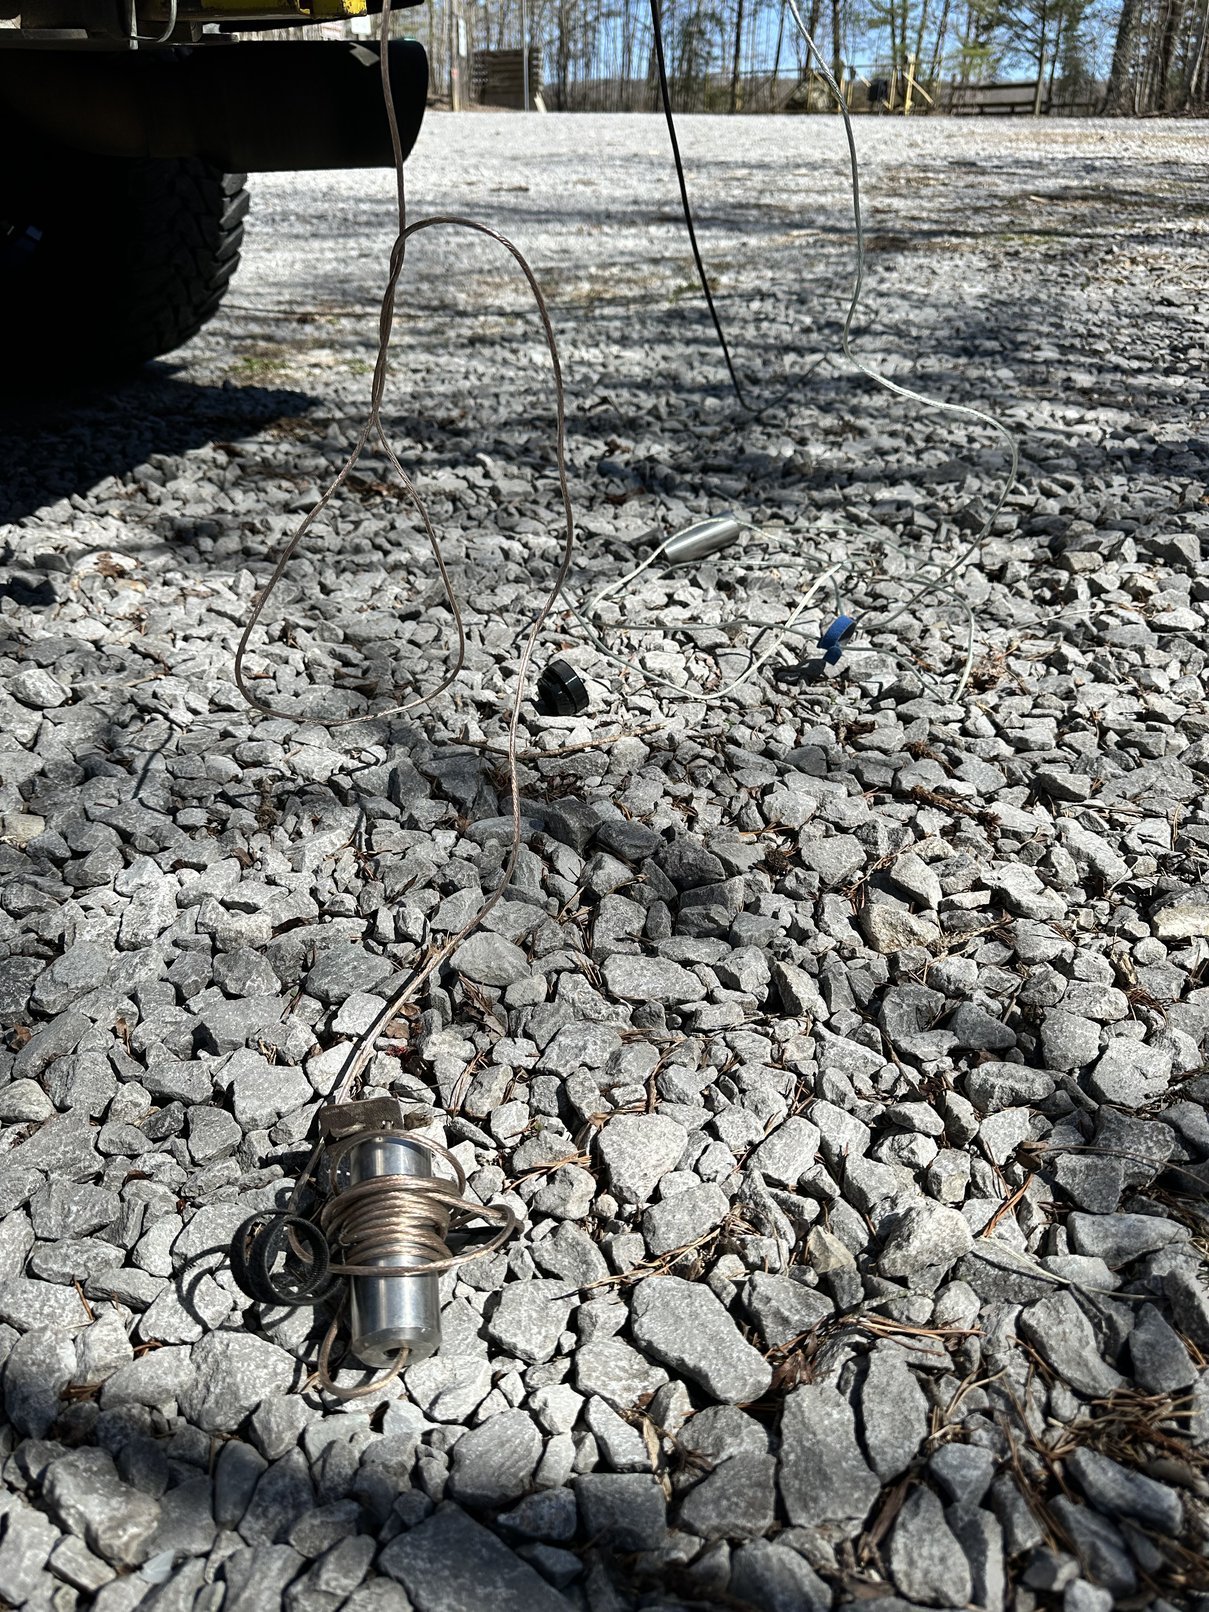
So then I did, what you see in the photo above with the radials as well as the photo below and got it to tune on 15 and then 10 meters as well. Looking back, I probably should have reconnected the radials once on 10 to see if they would help, but as it seemed, the capacitive coupling that I was getting worked really well and I was able to make some contacts anyway!

Yeah, the radials are not physically wired to the ground plane on the antenna at all. What this ultimately means is that the coax shield was being used for the ground plane to this antenna. That can be good and bad at the same time. I normally don’t like to have RF on the coax shield as it comes back to the radio and makes things weird in the “shack”. But today I guess that is what I did…or it was connecting to the regular radials through capacitance… I really don’t know. I do know it was working as I worked, Germany and Italy on 15 meters before tuning up to 10 meters, where I worked Croatia and Santiago, Chile! It is amazing what you can do with 10 watts and a well tuned antenna system.
What a wonderful place to have a POTA activation. It is relatively remote, with only a few mountain bikers rolling through the parking lot over the few hours I was there. This area sees less traffic than the Frisbee golf parking lot when it is warmer so I will come here if the other place is crowded.
Thanks for following along today and I hope this has inspired you to get a radio out and take it to a park to have a POTA activation of your very own.
73
David - WK4DS