Well, more news on the propagation beacon…

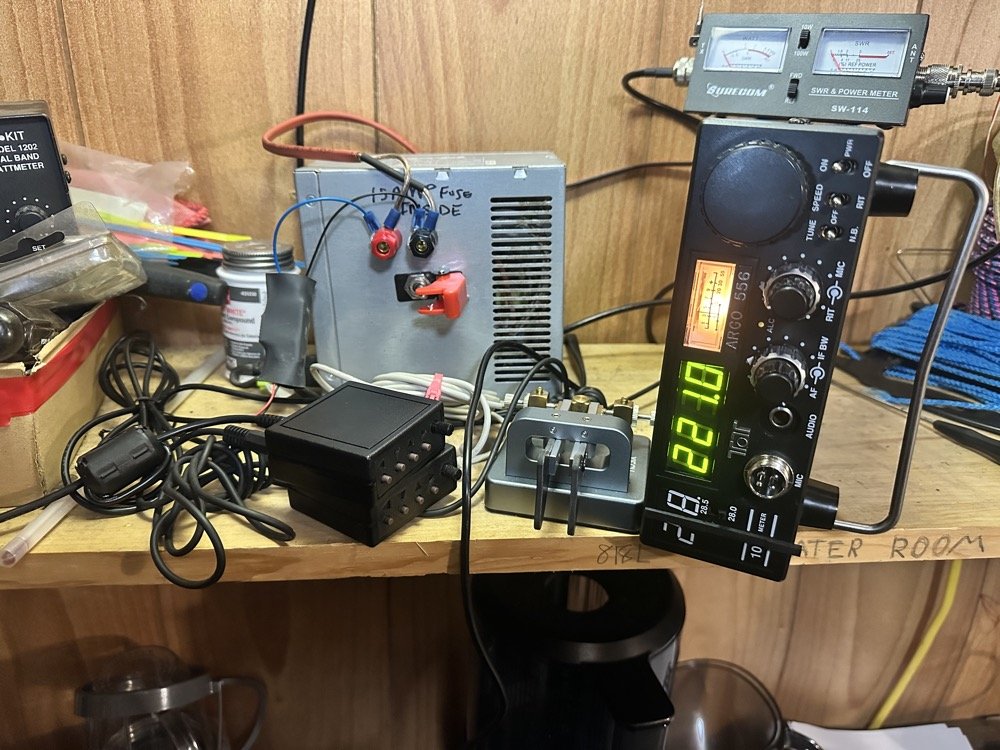
It looks like things have been busy in my shack lately as I have been working on upgrading things here and there. One of those upgrades was to add a bidirectional power/swr meter to the beacon. This in itself is no big deal…till it is. I had ordered a simple meter from eBay to add to the beacon system, but little unbeknownst to me, my buddy Roger had also had a plan, he got me a simple dual meter unit for an early Christmas present, so it would be more compact in the beacon shack. The new meter arrives and I go to install it and a whole series of events unfold that I am going to share here.

This is what the beacon looked like as of 9DEC2025 and was happily keying out my call-sign over the air at a measly 1 watt. I proceeded to JUST REPLACE THE METER ON TOP and the following happened to the system.
I lost output on the keyer, I also lost the transmit reset on the radio as well. Transmit reset is the part where the timer on top of the radio comes in. The HR2600 has an odd quality to the code it sends normally. There is this odd chirp at the beginning of each element that makes it sound terrible. BUT there was a work around, if I would simply press the transmit button after the beacon had started and the chirp went away. Now it was sending nice clean code and at the power level I wanted. So I had to figure out a way to get the radio to engage this mode upon auto-restart. You see, if this button is pressed upon power up, the radio will not transmit at all. It disables the transmitter. So I decided to wire a timer across the contact pads on the circuit board. To get this to work I had to open the radio, remove the existing push button switch and solder in some wires to get them outside of the radio to the timer relay. All this is fine until it isn’t. I didn’t bother to secure the wires inside the radio and this is where the problems started.
At some point when I was replacing the meter inline with the antenna, I somehow moved the radio enough to tug on these wires. This in turn apparently moved them enough to short the traces on the circuit board circumventing the timer altogether and making the radio not transmit at all… At the same time I had moved the wires enough to accidentally unplug the keyer as well. I apparently shorted the output somehow and this killed one of the mosfets in the keyer making it no longer key the radio at all. I didn’t figure this out till later when I finally gave up on trying to get the radio to transmit.
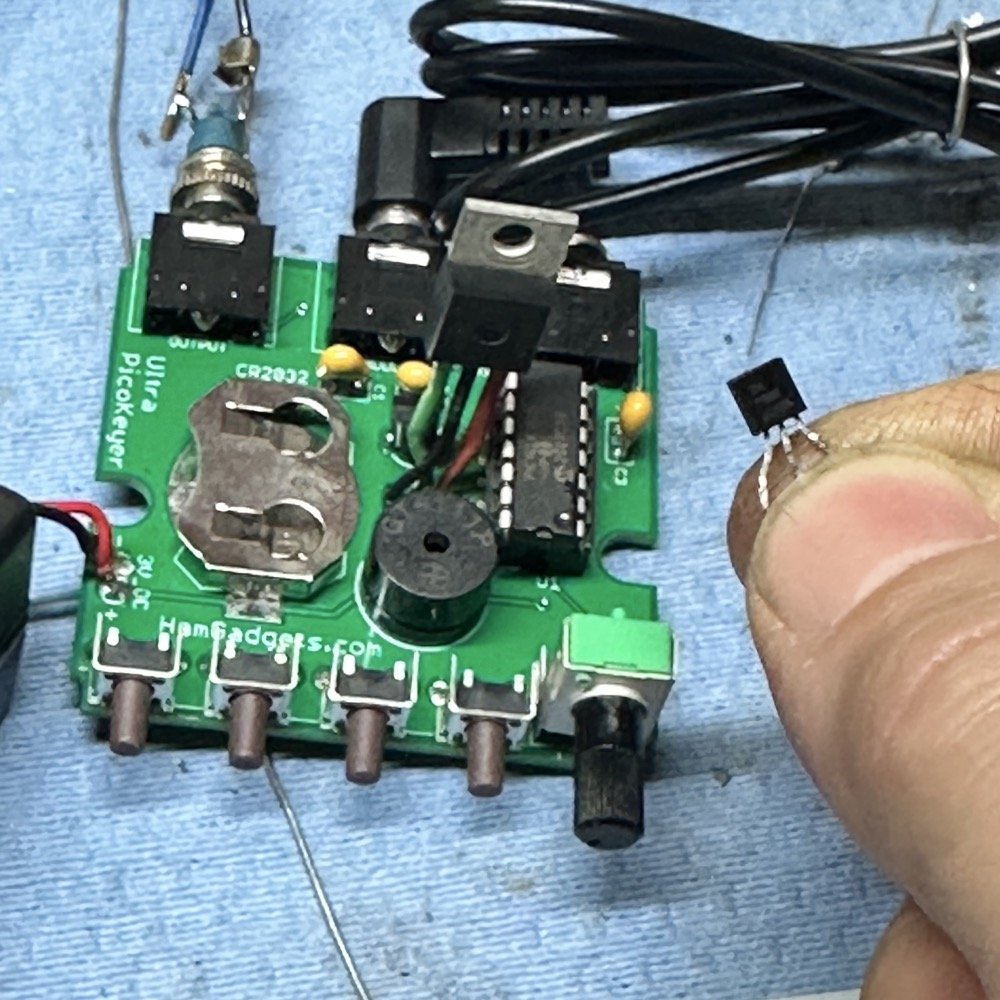
One of those tiny TO-92 package mosfets is dead and wont key the transmitter anymore…so I used a spare keyer I had and programmed it for the code string and tested it with a different radio.
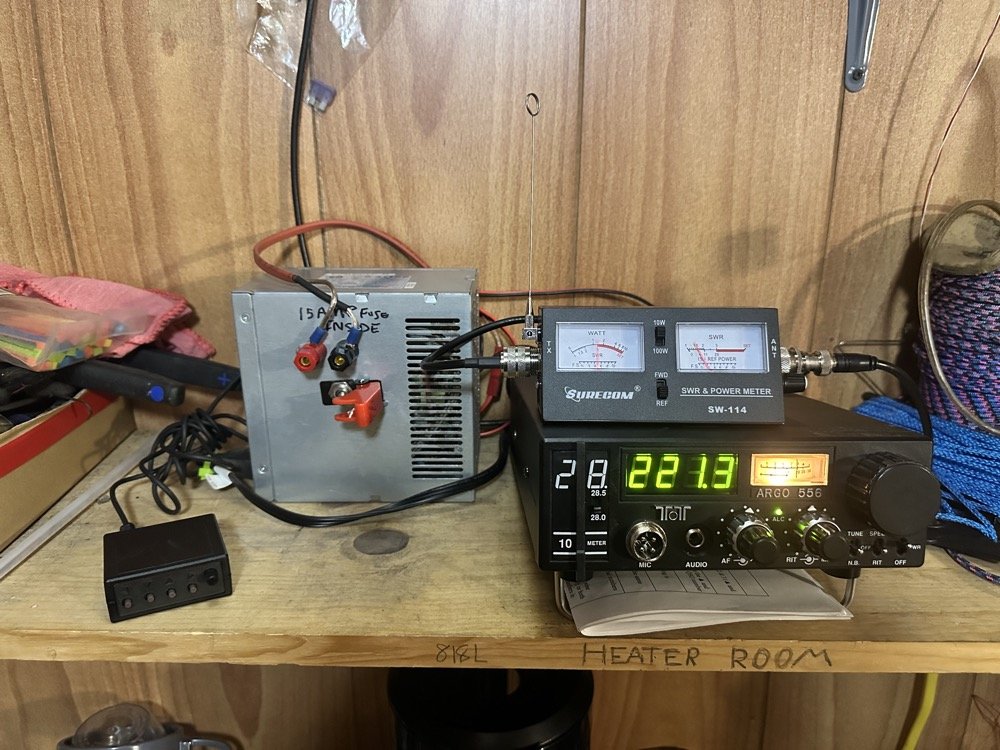
So this is what the shelf turned into pretty quickly. The whole thing got replaced short of the computer power supply. HaHa, that sure escalated quickly. Well, everything worked out so far as I have the beacon on the air today and it has already been picked up in the Canary Islands and both sides of the USA. I think all is well with the beacon again now. I just need to get the keyer back on the power supply so it wont need batteries all the time and it will be done. Programming the keyer is also kinda cool because the dev gave you macros to make it do things that eliminate the need for switches and such. Things like if you want it to start up upon power up sending a message like a beacon would do after a power failure, then you use a special code at the beginning of memory #1 and it will start automatically, if you want it to repeat endlessly, then you add the beacon command at the end. There is a whole list of these codes to get it to do all sorts of things and you can go here to read it. These keyers are really easy to use and are really cheap too.
To have 5 simple controls, the dev has made this keyer SO GOOD. Shoot, it will even auto-detect for a straight key! It does it all! Anyway, enough about these amazing little CW keyers and back to the beacon upgrade.
Almost done. Like I was saying, I still need to update the keyer power supply to run on the AC power supply and then it will be done. The Argo 556 is kind of a unicorn to be honest since it is the same radio as a scout but without the 50 watt amplifier module. Most people just bought scouts and turned them down if they wanted QRP operation. I found this one on QTH if memory serves me and it had one of the band modules I was searching for so I grabbed it up mainly for the modules but the little radio works too good not to use it. I am kinda glad I have found it a job where it can be productive. I still need to fine tune the frequency to 28.221mhz and call it good. Kinda glad that all this happened at the same time to be honest, this way I was able to update the system to a better radio as well as find a possible problem with the keyer. I am still not convinced that the radio might have killed the keyer somehow, but I don’t know. I know that the two mosfets measure different in circuit so I am going to pull them out and see if they are bad. Something like blown gates could cause them not to work if I had to guess. We will see soon.
Turns out it went open, probably a dead gate junction, but none the less, it was no longer operational. I dug through my parts box and found a 032N06N MOSFET which had similar specs but WAY more current capacity as it was a TO-220 package device out of a power supply of some sort. I hooked the replacement candidate up on a breadboard and tied it to an LED for a while to see if it would work like I wanted and it did, it worked perfectly for me since the switching speed is so low, it is basically an electronic relay. This made me happy for some reason…haha.
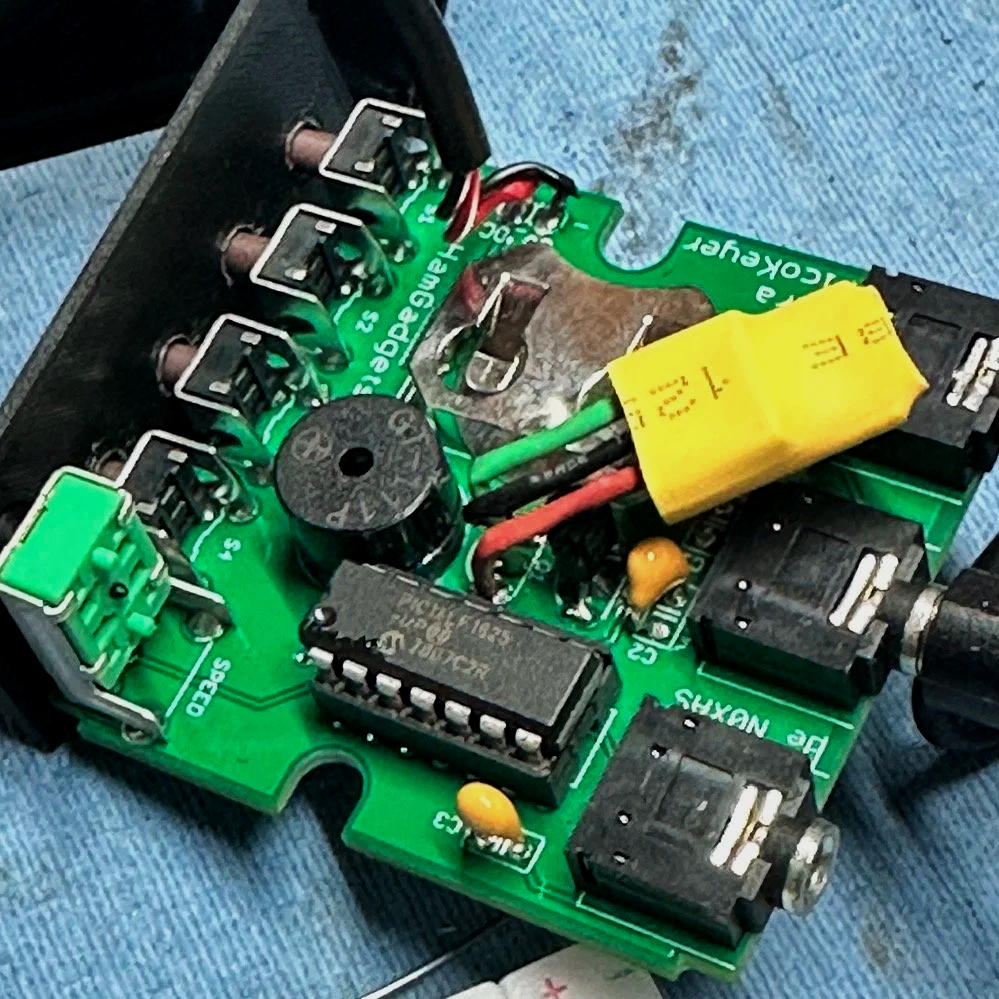
Either way, I lengthened the leads so I could do “criss cross apple sauce” with two of the leads (the gate and the drain were wrong) to get it to fit the circuit board and away we went! Once installed, I hooked it up to an LED to see if it would work and it happily churned out CW in the visible light spectrum for a couple of hours while I worked in the shop. Armed with this new confidence, I reinstalled it back on the beacon and it is working perfectly again. I did put some heat shrink over the tab of the new MOSFET, as it is connected to one of the terminals, so it would not short something out in the keyer when the covers were put back and left it like that. Later that day, I simply waited till the sun went down and the 10 meter band closed before putting it back into operation, that way there would be no interruption in the signal out into the world.

Anyway, I wanted to share my little misadventure with you all and note that the beacon is still up and running, just now with a REAL CW rig at the helm instead of a lesser machine.
73
WK4DS